When you first run RavenGive, the first thing you will be presented with is the Configuration dialog. On subsequent executions, you can bring up this dialog by selecting "Configure" from the File menu, or from the right-click menu on the RavenGive system tray icon.
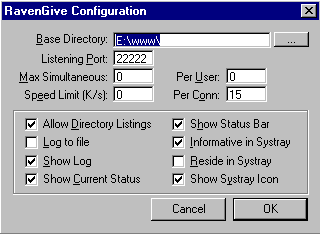 The configuration dialog depicted to the left is that of a registered user - for unregistered users, there is a "register" button in the lower-left corner, and the boxes for "Max Simultaneous", "Per User", "Speed Limit" and "Per Conn" are disabled.
Base Directory: This will be the root of your webserver's filesystem, above which the client cannot access. If someone goes to "http://your-ip/" they will receive the "index.html" or "index.htm" file from this directory, or a list of the files in the directory if neither of these two files exist. If the files don't exist and directory listing is disabled, they will receive a 'forbidden' error. The base directory may be typed in directly, or selected with a dialog box by clicking the button to its right.
Listening Port: This is the port on which the webserver will be listening. The default HTTP port is 80, and is what a client will attempt to access if they go to "http://your-ip/". If you change this to another number (usually because of firewalls), the client must go to "http://your-ip:port/" to access the server.
Max Simultaneous: This is the maximum number of simultaneous connections your server will allow. For unregistered users, this is limited to 4, which is usually plenty. Any attempts to connect more than this number of times will be rejected. Setting this to 0 means there is no limit. Limiting this too closely may result in image-heavy sites coming up with errors, even with only one user.
Per User: This is the maximum number of simultaneous connections from a single IP. It can be used to prevent malicious users from shutting down your computer by opening many connections then refusing to receive the data. Limiting this too closely may result in image-heavy sites coming up with errors. The best bet is to limit it to the highest number of images you have on a single page, plus one for the HTML and plus one for any other included files such as CSS.
Speed Limit: This is the maximum outgoing bandwidth the server can consume at one time. This is implemented by slowing all the open connections down to (this speed)/(number of open connections), with a minimum of 1K/sec. Thus, the maximum can be exceeded if there are more connections open than the number you set here. Also, sometimes you may be sending lower than the maximum when you could send more, if you have several slow clients and one faster client willing to receive the excess.
Per Conn: This is the maximum outgoing bandwidth that any given connection can consume at one time.
Allow Directory Listings: Disabling this is an extra security measure to prevent people reading listings of the directories you share. You shouldn't have to disable this - you should be willing to have any files in your shared directories read by your clients. If you want to hide listings, you should do it by making sure there is an index.html of some sort in every directory. Still, the option is available if you wish to use it.
Log to File: If this option is checked, whenever a connection finishes, some output is written to the end of "log.txt" in the RavenGive installation directory.
Show Log: This determines whether the grey 'Log' area of the main window is visible.
Show Current Status: This determines whether the white 'Status' area of the main window is visible.
Show Status Bar: This option shows or hides the status bar at the bottom of the main window, along with the information it displays. The same information may be available in the systray icon.
Informative in Systray: If this option is checked, the systray icon shows information - when there are active connections, a light in the upper left of the icon flashes green and red, tiny digits (you'll need good eyesight) in the upper-right show the number of connections, and tiny digits in the lower-right show total transmission speed in K/sec.
Reside in Systray: This will cause the main window to be hidden, and only the systray icon to be shown. The systray icon can be right-clicked to get to the configuration and return the main window.
Show Systray Icon: This will cause the systray icon to be visible. The option will be disabled (and forced to be 'on') if you have "reside in systray" selected.
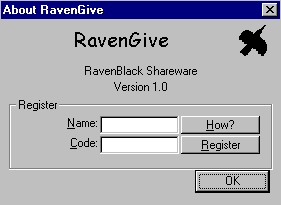 The registration dialog can be reached through the "register" button in the bottom-left of the configuration dialog, or from "about" in the help menu or systray menu.
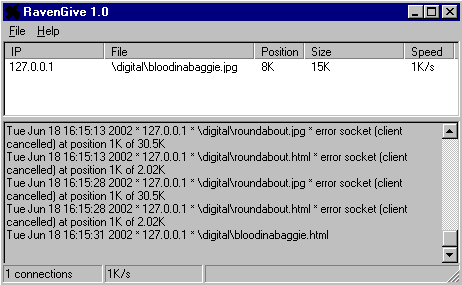 Depicted left: the main window with all parts active.